The framed painting that I am shipping is 3' x 4', so I will be able to use full sheets of plywood (4' x 8'). My crate needs enough room for cushioning
Shopping List:
- 2 - sheets of 1/4" plywood (cut to crate size 56" x 44". Some hardware stores will do these cuts for you.) For all your wood products use smooth finished surfaces. -- nobody wants a splinter. Avoid composite boards, but look for lightweight. I used under-layment and it was very smooth.
- 2 - Sheets of 5' x 8' foam insulation
- 2 - 1" x 4" 8' wood planks(2cut to 44" and 2 cut to 54.5". (AS I build the edges of the box, rather than 56", I have to adjust for the 3?4" thickness of the 1" x 4".
- 2 - Door Pulls
- 4 - 1'' bolts with nuts and locking washer
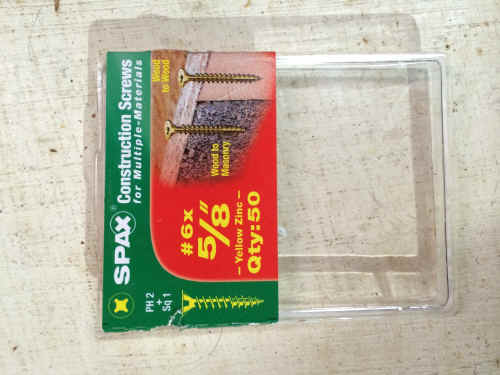
- 1 box of 5/8" or larger flat head wood screws 60+ count
- 8 - 2" flat head wood screws
- Carpenters glue
- 4 - Corner braces (When I finished this crate, I was happy with the firmness of the project and didn't use the corners. When I have used them, I put them on the inside corners, so that they would not scratch any floors' however you must put a lot of packing between them and your painting's frame, )
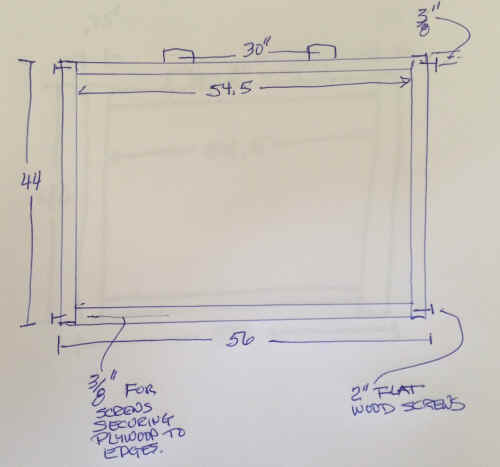
Here is my plan, pretty simple. Inside dimensions are big enough to accommodate my 3' x 4' painting plus the frame and some packing materials around the edge. On the top you can see where I am thinking about putting the handles.
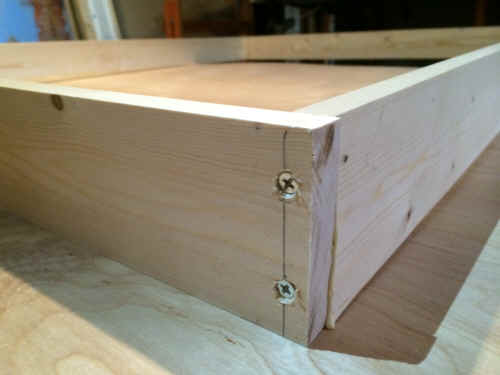
I put my short edge on the outside and the long on the inside, as I like to open the box by taking off the front. I set the screws half of the width of the boards, 3/8". I drill to pilot holes into the front board using a drill bit slightly smaller than the 2" wood flat head screws. Use corner clamps if you have them, it makes it a lot easier.
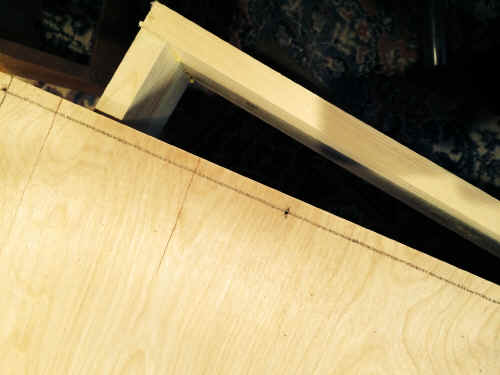
On the bottom sheet (44" x 56" piece of plywood), I mark of 3/8" from the edge and every 8"-12" mark where I will screw it into the edge.
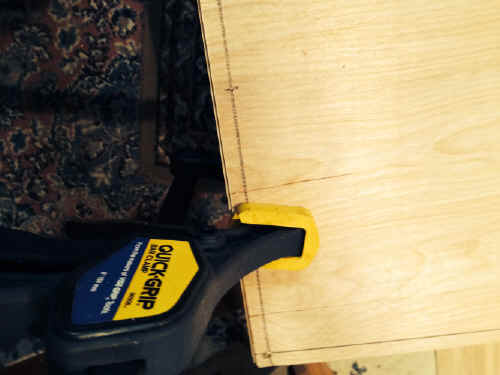
I use a small drill bit and drill pilot holes for the screws but only through the plywood. I run a bead of wood glue along the edge and then clamp the back to the edge.
I used this screws to secure the back to the edges and will repeat the process for the front later on, but will not use the glue.
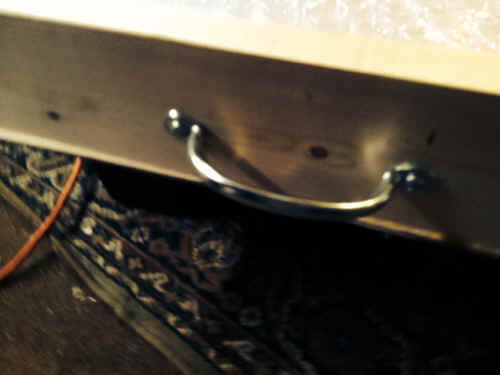
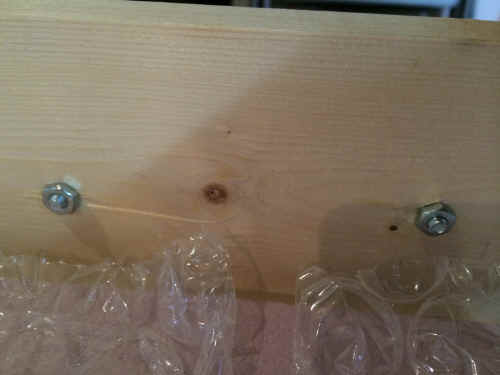
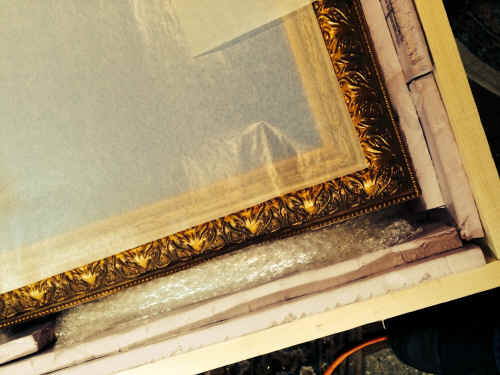
I added the door handles. I marked where I wanted them to go, then drilled holes large enough to put bolts (instead of the provided screws) On the back I put locking washer and bolts. I don't want the handles to come off. I think the courtesy of the handles encourages more gentle handling. Make sure to put plenty of insulation between the bolts end and your painting's frame.
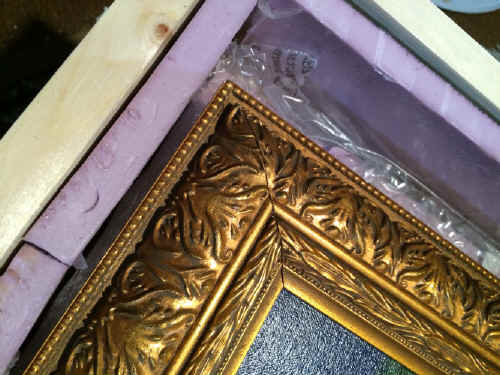
Once the back is on, I put a sheet of the foam insulation on the bottom and cut strips of insulation on the edges. Then I lined everything with bubble wrap. Finally I gently laid the painting into the assembly. This photo shows a lot of wiggle room. Be sure that everything is snug.

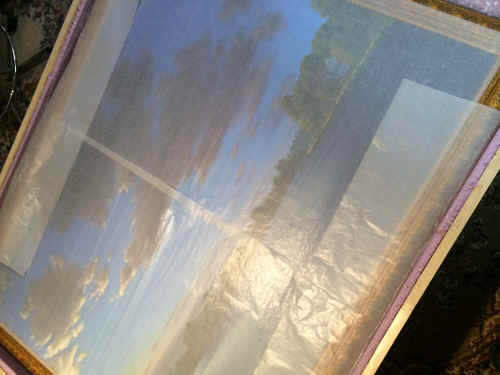
I laid sheets of glassine over the surface of the painting. I taped the pieces together, but only on the outside surface. I added another layer of bubble wrap and the final top layer of insulation.
Without using the glue, secure the top in the same way as the bottom. With power drills and screwdrivers, I like having the front removal, rather than one of the edges. To me it just seems easier to get to the painting. I write on the front (top panel). open this side.
I've used FED-EX for shipping. They are expensive, for my budget, but everything has always gotten there safely.
